Tuesday, April 14, 2015

Animation Project

For this project I will be doing a commercial for the first assignment we were given, our logo project! My logo represented a women's shelter called "She is Strong."


     Above is my VERY rough storyboard for the commercial. What I plan on capturing in my commercial is a girl who finds it in herself that she is capable of anything. The first scene will begin with her running down a flight of stairs, then running through rows of palms trees. The third scene will feature her running by the river, possibly admiring her reflection in the water, or something dealing with the water. The fourth scene will be the woman running under a big and finally up the stairs. The next scene will be her admiring the city, and then there will be a short scene explain what the logo is. Finally the last scene will be the logo itself!


Below is my final animation. The video is formed by putting together multiple pictures, formally known as a still motion! I'm pretty happy with the ending product. The only critics I have on it is I wished it was a little slower at the ending and I wish I could have fixed the image size of the slogan and logo. My friend Victoria was the one to help me take the pictures and I'm so thankful because they turned out so awesome! Enjoy! 


Monday, April 6, 2015

Lyrical Collage

It was actually really hard to think of what I wanted to make for my lyrical collage. At first, I thought it would be cute to do something with a beach. After pondering the idea, I felt a beach was too cliche. I like to go for a more realistic style rather than fantasy so I started searching through pictures on my phone to see what I could put together. The first three images are pictures I found on my phone, while the last two are images I found on google.


I first collaborated the three images by transforming them in many different ways: distorting, warping, skewing, etc. After I constructed a scene I added touches like the shadow on my body and the shadow by the wall on the left. I then decided that it would be a good idea to pick a lyric. I have a slight obsession with quotes and poems so this also gave me a lot of trouble. When doing most of my projects I like to relate them to my beliefs, or important things within my life. I wanted a quote that would relate to my life right now, at this moment. I decided to go with a line from a poem written by the famous author, Robert M. Drake. "There was a science to her genius, her madness, her beauty and  there was nothing she could not accomplish." I really felt a connection with the quote and the second after I read it I knew it had to be the one. I cropped and distorted the two google images above to fit my project and placed them where I thought they would look nice. I lowered the opacity on a lot of my images because I felt it made them look more realistic. Finally I added the quote on the railing and distorted/warped it to make it fit in better. Overall, I'm VERY happy with my project. I feel it really shows my appreciation for where I'm at in my life and where I intend on going! :) 


Tuesday, March 31, 2015

Photoshop Assignment

Our professor asked us to create an image by using photoshops tools like brushes, patterns, and gradients. The catch to the project was that most of the tools we used should be self made. By doing this, the students could start to master the technique of creating graphics through photoshop. In my project below, most of the work is self made. The sky is a gradient of yellow and light/dark blues. I used a diamond gradient because it made the yellow look like the sun! I then used a brush to write out the phrase "I love you." I used the distortion and blurring tools to make the words look the airplane wrote them... kinda like clouds. The plane is a cut out from a picture online. If I had more time on the project I would have liked to make my own airplane, but unfortunately that was not the case. The grass is a self made pattern from a image I found on google. I then used the perspective tool in transforming the shape of the grass to look more 3D. Finally, I drew out a flower and defined it as a brush then started to add simple touches to the grass. Although my project is simple, I find it cute and fun! I plan on giving it to my nana for Easter since the colors of the flowers remind me of Easter and she appreciate my small artworks :)


Photos found on Google Images, Used in Project: 

Cut out of airplane 


Grass Image used for self made pattern 


Monday, March 30, 2015

Magazine Cover

In class, we were asked to use a minimum of three images and some text to construct a magazine cover. I cut myself out of three different images to get the final product that is on the magazine cover. The original photos used are below the cover. I made myself into a devil and an angel who are trying to influence the middle picture of myself, who obviously feels overwhelmed. I tried to keep it simple with my text because too much text or images together makes me feel like it's cluttered. Overall, I'm pretty happy with my magazine cover, I think the idea is really cute. My favorite part would have to be the title of the magazine because I think the drop shadow makes it look very clean and professional. I really enjoy photoshop and being able to completely warp and change an image with different tools so this project was very fun to do!


Original Pictures :


Monday, March 23, 2015

Self Insertion

This is my self insertion project! Our professor asked us to insert ourselves in a place that we have never been before. Since I've always been adventurous, daring, and admiring of nature, I thought it would only make sense to place myself at a high altitude in front of a beautiful scene. The first two picture are my final projects. The first picture I like to call "Stepping into the Fog" because I have edited my self to look like half of my body is beginning to be taken in by the fog. I did this by lowering the opacity of the eraser and erasing part of my upper body. For the second picture I inserted myself stepping on the rocks. The only thing I had to do to fit myself into the scenery is change my contrast. I also changed my saturation to be more of an orange or red because my picture was set at the time of sunset. The last three photos are the original images that I based my projects on. Overall I really enjoyed this project, and hopefully one day I will be able to take a REAL picture of myself in these beautiful places. :)


Friday, March 20, 2015

HTML Project

This project had to have been the hardest art project I have ever done, but having an awesome, patient, and understanding professor gave me the ability to make it the best I could be. At first, I thought I could do the cartoon Mickey Mouse head, but after much failure I decided I might have bitten off more than I could chew. After talking to my mom about a couple ideas she thought that it would be cute to do the city emoji, and I agreed! Below is the city emoji and the graph that I drew my sketch on. HTML is VERY touchy and if you have one number or letter wrong you may ruin your whole project. By graphing my sketch out it was very easy for me to plug in the points and see where things were going to be placed.


TA DA! This is my end product, that I'm honestly very proud of! It took me a lot of time and patience to  figure out all of the positions for the shapes. The most difficult part would have probably been the colors, especially the gradient, just because when adding in colors sometimes the whole project would go blank and I would have to figure out what happened and fix it! I would say that my project resembles the emoji very well. If I could change anything it would probably be to figure out the positioning of the curves around the sun better, although it's very difficult to figure out the control points for them... Overall I'm very happy and proud of my product. I had absolutely no knowledge of HTML before this project so now that I do, I can really appreciate other student's intricate projects! Being skilled in this area of art really takes talent!  


CODE FOR PROJECT:

<!DOCTYPE HTML>
<html>
<head>
<script>
window.onload = function() {
var canvas = document.getElementById("myCanvas");
var context = canvas.getContext("2d");

////////////////////////////////////// start below this line ˇˇˇˇˇˇˇˇˇˇ

//radiance
context.beginPath();
context.moveTo(280,0);
context.lineTo(325,25); 
context.stroke();

context.beginPath();
context.moveTo(225, 125);
context.bezierCurveTo(125, 125, 225, 1, 50, 25);
context.stroke();

context.beginPath();
context.moveTo(225,200);
context.lineTo(100,250); 
context.stroke();

context.beginPath();
context.moveTo(325, 300);
context.bezierCurveTo(360, 360, 125, 325, 135, 400);
context.stroke();

context.beginPath();
context.moveTo(550,300);
context.lineTo(625,425); 
context.stroke();

context.beginPath();
context.moveTo(625, 225);
context.bezierCurveTo(700, 150, 700, 300, 775, 250);
context.stroke();

context.beginPath();
context.moveTo(625,125);
context.lineTo(775,75); 
context.stroke();

context.beginPath();
context.moveTo(575, 50);
context.bezierCurveTo(575, 0, 660, 50, 650, 0);
context.stroke();


//circle (sun)
context.beginPath();
context.arc(425, 150, 150, 0, 2*Math.PI, false); 
var grd=context.createRadialGradient(375, 50, 100, 425, 100, 200); 
grd.addColorStop(0, '#ff9933');
grd.addColorStop(1, '#ffcc00');
context.fillStyle = grd;
context.fill();
context.stroke();


//first rectangle
context.beginPath();
context.rect(0, 375, 100, 225); 
context.fillStyle = '#ff9900'; 
context.fill();
context.stroke();
//windows for first
context.beginPath();
context.rect(5, 390, 20, 20); 
context.fillStyle = '#ffffcc'; 
context.fill();


//third rectangle
context.beginPath();
context.rect(200, 300, 100, 300);
context.fillStyle = '#000000'; 
context.fill(); 
context.stroke();
//windows for third
context.beginPath();
context.rect(265, 325, 25, 25); 
context.fillStyle = '#ffffcc'; 
context.fill();
context.beginPath();
context.rect(225, 375, 25, 25); 
context.fillStyle = '#ffffff'; 
context.fill();
context.beginPath();
context.rect(250, 500, 25, 25); 
context.fillStyle = '#ffffcc'; 
context.fill();


//second rectangle
context.beginPath();
context.rect(0, 500, 150, 100); 
context.fillStyle = '#cc3300'; 
context.fill();
context.beginPath();
context.rect(150, 450, 75, 150); 
context.fillStyle = '#cc3300'; 
context.fill();
//windows for second
context.beginPath();
context.rect(25, 550, 25, 25); 
context.fillStyle = '#ffffff'; 
context.fill();
context.beginPath();
context.rect(150, 525, 25, 25); 
context.fillStyle = '#ffffcc'; 
context.fill();


//fourth rectangle
context.beginPath();
context.rect(300, 450, 50, 150);
context.fillStyle = '#ff9900'; 
context.fill(); 
context.stroke();
//windows for fourth
context.beginPath();
context.rect(318, 460, 20, 20); 
context.fillStyle = '#ffffcc'; 
context.fill();


//fifth rectangle
context.beginPath();
context.rect(350, 250, 150, 350);
context.fillStyle = '#cc3300'; 
context.fill(); 
context.stroke();
//windows for fifth
context.beginPath();
context.rect(400, 300, 20, 20); 
context.fillStyle = '#ffffff'; 
context.fill();
context.beginPath();
context.rect(450, 375, 20, 20); 
context.fillStyle = '#ffffcc'; 
context.fill();
context.beginPath();
context.rect(400, 500, 20, 20); 
context.fillStyle = '#ffffff'; 
context.fill();

//sixth rectangle
context.beginPath();
context.rect(450, 450, 50, 150);
context.fillStyle = '#000000'; 
context.fill(); 
context.stroke();
context.beginPath();
context.rect(500, 350, 75, 250); 
context.fillStyle = '#000000'; 
context.fill();
context.stroke();
context.beginPath();
context.rect(575, 450, 50, 150); 
context.fillStyle = '#000000'; 
context.fill();
context.stroke();
//window for sixth
context.beginPath();
context.rect(515, 400, 25, 25); 
context.fillStyle = '#ffffff'; 
context.fill();
context.beginPath();
context.rect(550, 525, 25, 25); 
context.fillStyle = '#ffffcc'; 
context.fill();
context.beginPath();
context.rect(550, 475, 25, 25); 
context.fillStyle = '#ffffcc'; 
context.fill();
context.beginPath();
context.rect(460, 550, 25, 25); 
context.fillStyle = '#ffffcc'; 
context.fill();

//seventh rectangle
context.beginPath();
context.rect(600, 300, 175, 300);
context.fillStyle = '#cc3300'; 
context.fill(); 
context.stroke();
context.beginPath();
//windows for seventh
context.rect(700, 325, 20, 20); 
context.fillStyle = '#ffffff'; 
context.fill();
context.beginPath();
context.rect(700, 375, 20, 20); 
context.fillStyle = '#ffffcc'; 
context.fill();
context.beginPath();
context.rect(625, 525, 20, 20); 
context.fillStyle = '#ffffff'; 
context.fill();
context.beginPath();
context.rect(650, 460, 20, 20); 
context.fillStyle = '#ffffcc'; 
context.fill();

//last rectangle 
context.beginPath();
context.rect(700, 475, 100, 125);
context.fillStyle = '#000000'; 
context.fill(); 
context.stroke();
//windows for last
context.beginPath();
context.rect(735, 500, 20, 20); 
context.fillStyle = '#ffffcc'; 
context.fill();
context.beginPath();
context.rect(760, 535, 20, 20); 
context.fillStyle = '#ffffcc'; 
context.fill();
context.beginPath();
context.rect(710, 550, 20, 20); 
context.fillStyle = '#ffffff'; 
context.fill();

////////////////////////////////////// end above this line ˆˆˆˆˆˆˆˆˆˆˆˆˆˆˆ

};

</script>
</head>
<body>
<canvas id="myCanvas" width="800" height="600"></canvas>
</body>
</html>​

Tuesday, February 24, 2015

Vector Illustration

In this project we were directed to draw an illustration from a photograph. I decided to honor the legendary comedian and do my project on Robin Williams. For the illustration, I used the pen and pencil tool. For the background I used the pencil tool to draw shapes, then blurred them together with the blur effect. When drawing Robin, I outlined the bigger objects in the photograph like his shirt, collar of his shirt, neck, ears, hair, head, nose, and eyes. I filled each part with a solid color and then went back and made shapes out of the lighter and darker areas of the objects to make them feel real, and not cartoonish. I feel pretty good about my project, and if Robin was still here to see it, I feel like he would appreciate it as well!

Tuesday, February 17, 2015

Exquisite Corpse

My professor requested that we create a vector illustration from one of the three sketches:


I chose the first one to draw for my project! I finished my project today, Tuesday the 17th 2015 which is actually Mardi Gras, so naturally I had to incorporate the holiday. I put my character throwing candy in a Mardi Gras parade. I found it sometimes difficult to place certain objects in a perspective way but overall, I feel I did a pretty good job. Another difficult part of the project was the shading and coloring. I tend to like to do projects on a gray scale rather than in color but I just went with the Mardi Gras theme of yellow, green, purple, and a little bit of red. I think my project is funny and colorful which makes me happy. I had a lot of fun doing this illustration!  


Tuesday, February 10, 2015

Final Logo

I decided to go with the "She is Strong" logo idea. My thumbnail being this: 


My first design started out with this: 


After much consideration and critiques from two professionals, I decided to change my final to this design: 


I self evaluate my projects pretty strictly so overall I would say my logo is okay. I like the spacing on my final design rather than the first one. I also admire the bolding of the words and some of the design. I felt bolding some of the design really made the name stand out. If I could change anything I did during the project I probably would have found more people to give me opinions on how to make it better. I like having other people to judge my work and see if I can get an overall opinion on what I should do to improve it. Personally, if I would rate my logo on a scale of one to ten, one being horrible and ten being exceptional, I would probably rate it as a 8.8 or 9. 

Saturday, February 7, 2015

Calligram

A side project that our professor assigned to us was this! It's called a calligram, or a image that is made up of words. I found it very interesting and fun to create. The birds are made up of a poem that talks about freedom while the cage is made up simply of the word cage and the phrase "cage that prevents freedom."


Monday, February 2, 2015

Logo thumbnails

Some of these logos are for my "Plasmic" makeup store company and others are for my "She is Strong" woman's shelter company. 
 After listening to opinions of my classmates and professor, we came to the final decision of this logo thumbnail for the company "She is Strong":
 and this logo thumbnail for the company "Plasmic":

Sunday, February 1, 2015

Logo analysis

1. I personally feel the logo of Nike is one of the world's most largely known logo. The iconic check mark is easily visible and can be printed in multiple  colors according to theme of  different products. Nike's slogan "just do it" also goes with with their logo due to the fact that after you "just do it" you can check it off of your list of things to do. I feel nike has created a very strong logo to represent their brand. 
2. Pizza Hut has changed their logo multiple times over the years. The logo on left is their old one and the logo on the right is their recently new one. I feel that due to Pizza Hut's changing logos the company has lost many customers. In an advertising class that I had last semester, we learned that changing your logo a lot can confuse consumers of company ownership. It seems that has been the case for this brand. Comparing the two logos I feel that the old one represents the brand better than the new one. The new one actually reminds me of the target logo, whereas the old one is clean and understandable. The colors in the old logo resemble the colors of a pizza and I think that is a clever concept to have in their logo. I would recommend to the brand to change their logo back to the old one and keep it that way! 


3. Diet Coke has made a few little changes to their logo over the years but it basically has stayed the same. I enjoy this logo because I feel it's simple and appealing. The curve in the D represents the crisp taste of the soda where the bold, red, "coke" looks great on the can. Diet coke has a rather large target audience and I think their logo is successful in reaching so many consumers. 


4. I chose this logo to write about specifically because I think I would like to do a logo for a make up company. Urban Decay is obviously a makeup company with a large audience of women from 15 years old to about 50 years old. Their make up is very bold and colorful. The deep purple in their logo is also seen in most of their packaging. I find this useful to consumers because it makes it easy to pick out the brand in large make up stores. The use of a font with curvy edges is clever in the logo considering their slogan: beauty with an edge. The bold "UD" is also clever of the brand considering a lot of their products are very bold and can really make a statement to your outfit and look. 


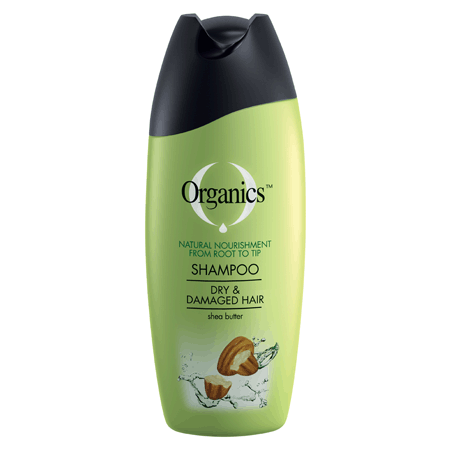
5. The last logo I chose to analyze is the logo of a hair product line called Organics. I feel the logo on the bottle is very clean and sleek. My favorite part of the logo is the little droplet from the bottom center of the large "O". I think it represents the product well because shampoo is normally used when your hair is wet, and to me the droplet represents a fresh nourishing ability which is what most people want their hair products to do.  I like the clean simple style of the "O". I feel I seem to gravitate more to simple logos with natural and dull colors rather than bright, bold logos. I think I tend to like these types of logos more because to me, sleek and clean represents more of an expensive higher quality brand, rather than a bright, big bold logo that looks like the brand would represent cheap products.

Tuesday, January 27, 2015

5 Logo Ideas

1.  "Creative Cupcakes" is introducing a new cupcake: Caramilla Avalanche! This cupcake would feature a vanilla cupcake with caramel filling and white chocolate icing with white chocolate crunches and caramel drizzled on top. The design of the cupcake could be the main focus of the logo with the name, "creative cupcakes" big and visible on the wrapper.


2. "Plasmic" would be an organic makeup store. All of their products would be organic obviously and their products would range from, eyeshadows and face cleansers, to makeup brushes and bags! Their logo would probably consist of more earthy tones considering their products are organic and natural!


3.  "She is Strong" would be an abused women's shelter. This secure place would be a location where women who have been hurt can come to talk to therapists or even someone who is going through a similar situation. The location would also offer stress relieving activities and a place where women can regain their strength.  The logo would probably be a mixture of blacks, whites, and deep reds. These colors, to me, represent strength. The logo's main focus would probably be a design similar to one featured in the picture to the right. >


4. "Under the Sea" would be an upscale seafood restaurant. I would love for the logo to have more of a cartoony feel. For example, maybe have fun sea creatures holding the name of the restaurant up, or an expensive fish blowing bubbles, and the name would be in one of the bubbles. This company could also be launching a new product but I'm not sure what I could make up without getting the design too intense. The color scale for this logo would be greens, blues, and maybe some coral colors.


5. "Hammock Heaven" would be an area for teens and young adults to come hang around and relax. The area would be located in a huge building, where inside hammocks would hang over large white, fluffy, cloud-looking pillows. The logo for this idea could be the name shaped into a hammock with rays of light coming from behind, or possibly the name curved on a bed of clouds. The colors would be tans and white.


Saturday, January 24, 2015

Introduction

Hi! My name is Devan McDowell but I tend to go by Dev. I'm a second semester freshman at the University of Tampa. I am really happy with decision I made to travel far away from my hometown of Pittsburgh, Pennsylvania....although, all my friends and family question if I actually go to school or if I'm on vacation due to my beachy Facebook posts! lol. 


When I first came to the University, I knew that I wouldn't been joining any sorority because that just wasn't me. I decided that I needed to join something, so I tried out for the school's cheerleading team. I MADE IT! 


Unfortunately after only a few short months, I made the decision to leave the team... :( I have been cheering since I was in middle school, 11 years old, and felt that the cheer team at the University of Tampa wasn't challenging enough, or w e l l o r g a n i z e d. I am happy I gave the experience a shot considering I made great friends, and found my roommate for next year! (featured in the first picture above) Woo Hoo!

I took four years of graphic design in high school so I'm very familiar with a lot of the programs talked about in class. I'm excited to see what I will remember and what I will need to relearn. The projects I did in high school were more for presentation and basically just the fun of it. My teacher was very laid-back and funny so she let us do whatever project we wanted. I'm excited to make projects in this class that I could possibly show to future employers and maybe even find a dream career! 

I am a very positive, open-minded individual who is just trying to find her place in the world! A strong belief I have is: I refuse to go into major/career path for the money aspect. I believe that if you are doing something you truly love and enjoy, that the money will come to YOU! I love learning new things, especially artistic stuff that will give me the ability to speak my mind through design. I plan to have a great second semester with the students and professor in this class! :)